WPS

Do-It-Yourself Collecting Ideas
Wilmington, NC


by Jimmy Jordan

Revised 10/27/08

        Here are some ideas, tips, and projects that will make your collecting activities easier and less expensive.   Some of them are even fun to make!   I don’t claim that they are all original, but I do know that they work.   Take a look and see if there is something here that will help you enjoy the hobby more.   Cost or price information is current as of June 2008.
Xoom View

DRYING BOOK

        Soaking used stamps off of paper has always been a popular activity for collectors. Using a drying book is one way to make sure the stamps are pressed flat while drying. These books consist of some type of non-stick surface, for the gum side of the stamp, and blotting paper. Commercially make books are available, but costs run about $8 - $14. These multi-page books do a good job, but they are expensive and cumbersome to use.
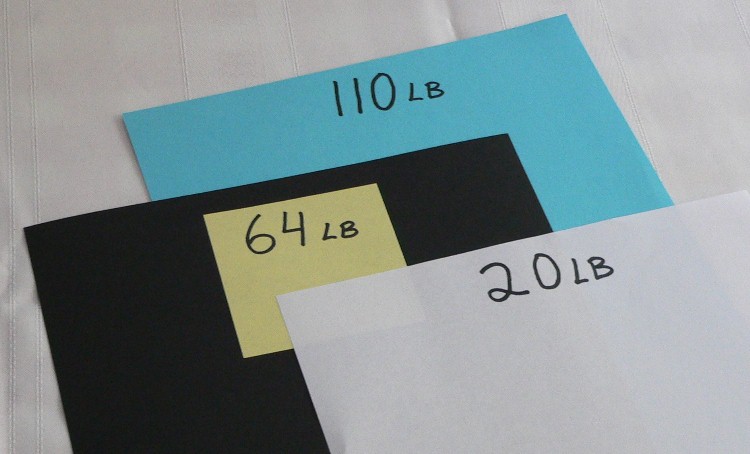
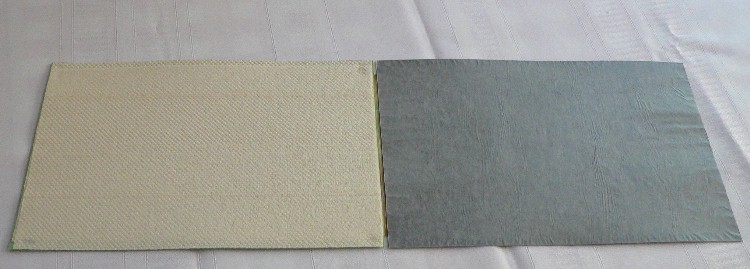
        You can make your own book using light weight cardboard (poster board or empty cereal box), paper towels, waxed paper, and tape. I used white c-fold restroom paper towels because they are a perfect size and black cardboard so defective stamps are easy to see. I have never had any trouble with stamps sticking to the waxed paper.
        Start by cutting the top and bottom “covers” from the cardboard. For convenience, make them the same size as an unfolded paper towel. Use a glue stick, ‘white’ glue, or double sided tape, to fix the four corners of a double thickness of paper towel to the underside of the top cover. Cover the topside of the bottom cover with waxed paper. It is best to wrap the waxed paper over the edges and tape it down to the back. Make sure the waxed paper is smooth and flat. Place the top cover on the bottom cover and use a wide piece of tape at the top to make a hinge.
        To use, remove your soak stamps from the water. Place the stamps on a paper towel long enough to remove any excess water. Then place the stamps in the drying book with the gum side on the waxed paper. Close the book and use a weight to press the stamps flat while they dry for a day or two. A Scott Catalog makes a good weight.

Xoom View

CLUMPS of STAMP HINGES

        Used stamps are most often placed in our albums using hinges. These little slips of gummed glassine are cheap and do a good job of holding stamps in place. One aggravation is that hinges fresh out of the envelope are clumped together. This is the result of the manufacturing process. It is tedious and time consuming to separate the clumps into single hinges. There is a fast and easy way to fix this problem.
        Dump the envelope of new hinges into a bottle or small box. I use an old vitamin bottle. When you need a hinge, shake the bottle a few times. This will knock the clumps apart and provide you with single hinges ready to use.

Xoom View

ACID FREE PAPER

        Acid free paper is used in our albums to help protect our stamps. Blank pages from an album publisher or manufacture can be expensive. It may be necessary to pay their price if we need the pages to match an existing album. However, to make homemade albums, there are much less expensive sources of acid free paper. Look in the scrapbook sections of craft stores and discount (Wal-Mart) stores. Their prices should be 50 to 75 percent cheaper than the album makers. Another source is office supply stores. Look for “acid free” on the package. Letter size (8½ x 11) is usually the only size available in an office supply store. Paper comes in different “weights”. Copy paper is usually 20lb to 24lb and not heavy enough for most album pages. For our purpose 64lb will work fine. For large or heavy items, 110lb stock may be best.

Xoom View

DOG EARED PAGES

        Most album pages have square corners. The problem with this is that square corners tend to get folded over or “dog eared”. This is not only ugly but can keep the pages from lying flat. To fix this, use a corner clipper. This is device about the size of a small stapler and works much like finger nail clippers. Slide the corner of the page into the clipper and snip the sharp corner off. This will make a nicely rounded corner that looks good and is harder to damage. You can buy these for a few dollars in the scrapbook section of craft and discount stores.

Xoom View

SELF ADDRESSED RETURN ENVELOPES

        We often have a need to enclose a stamped self addressed return envelope with a letter. The return envelope will need to be folded several times if it is the same size as the outgoing envelope. This makes a very thick letter. The solution is to use different sizes so that the unfolded return envelope will fit inside the outgoing envelope. The most common sizes are 6¾, 9, 10, and 12. Size 9 is the smallest that will hold 8½ x 11 paper without folding it side ways. Each size will easily fit into the next larger size. You may have to go to an office supply store to find sizes 9 and 12.

Xoom View

FOLDING A LETTER

        I don't know how many times I have folded a letter and then found that it would not fit into the envelope. One day I realized that the envelope could be used as a folding guide. This will work with 8½ x 11 paper and size 9 or 10 envelopes. Place the envelope on top of the sheet of paper with the envelope extending slightly past the top margin of the paper. Then fold the free edge of the paper over until it just touches the bottom edge of the envelope. Remove the envelope and complete the last fold. The letter will fit into the envelope every time the first time.

Xoom View

REFERENCE CARDS

        Often the same stamp may be issued in a number of different formats. Identifying a large group of these stamps can be a real chore. I have found that making my own reference cards can make this job much easier. I illustrate the card with real stamps and make notes about each stamp. In the cards shown you can find the Scott Catalog number, perf gauge, self adhesive (SA) or water activated gum (WA), plate number will start with a P, S, or V, and other information. These cards are only needed when there are a number of "different" stamps that look just alike.

Xoom View

MOUNT CUTTER

        Most mint stamps are placed in our albums with stamp mounts instead of hinges. This keeps the gum in perfect condition. The mounts are cut to size using either a guillotine or rotary cutter. The cutters marketed for stamp mounts are rather expensive. A 3½ inch capacity guillotine sells for around $20.00, a 6 inch capacity for around $40.00. These are too small for the large mounts needed for souvenir sheets and large blocks. A 12 inch capacity rotary mount cutter sells for around $65.00. This is large enough for any mount we would need to cut, but still expensive. The solution is to not buy a "mount" cutter. Go to the craft or office supply store and buy a paper cutter. They are used to cut paper and crop photos, but will cut mounts just fine. The best part is that a 12 inch capacity rotary paper cutter sells for $14.00 to $24.00.

Xoom View

ALBUM LABELS

        Most album binders are sold without labels. We have to buy a country name label to stick on the binder. These labels sell for $2.00 to $3.00 each. To save some money, go to Wal-Mart or the craft store and buy stick on letters. A sheet of over 200 letters and numbers cost $0.98. I labeled nine binders for less than $3.00 and a few minutes of work. I used gold letters on my green binders and silver letters on my black binders.

Xoom View
Xoom View
Xoom View

ALBUM PULL TABS

        I found it difficult to pull my albums out of their dust covers and knew there had to be a way to make it easier to do. The solution was a pull tab made out of ribbon. Using fast tack craft glue, a hot glue gun, or yellow woodworking glue, attach the end of a loop of ribbon inside the spine at the bottom of the binder. This make a perfect handle to pull the album out of the dust cover. The cost of this one was almost nothing.

Return to Main Page
WingNet Round-the-World Flights
Visit the American Philatelic Society